For more products please visit http://www.weedo.ltd / https://www.weedo3d.com
Sidebar
spark_app
This is an old revision of the document!
Table of Contents
Mobile app connects to Spark system
Android-OctoRemote
OctoRemote installation and setup
1. Search for the keyword turbineemo in the Google Play Store, or download and install OctoRemote from the link below
OctoRemote 1.3.5

2. Open OctoRemote, in the Add Printer interface, enter the print name, such as my3dprinter

3. In the IP Address field, enter the IP address displayed on the Spark Network Control Box screen, such as 192.168.10.13

4. Use the computer to open the page of the Spark network control box, enter the parameter setting interface, FEATURES→ API, and the QR code corresponding to the API Key is displayed on the screen.

5. Click the QR code icon on the OctoRemote interface and use the camera to scan the QR code on the computer screen

6. Click the button to the right of Enable webcam to open the camera setting options, and change the Webcam URL to
xxx.xxx.xxx.xxx:8080/?action=stream
xxx.xxx.xxx.xxx is the IP Address above

7. Click ADD PRINTER to complete the printer setup

OctoRemote Features
1. Print task interface, showing the status of the printer and the progress of the current print task

The interface is sliding, and it is a file list that displays the printable files in the Spark system and the printer SD card.
Click the blue icon in the lower right corner to upload the gcode file

2. 温度控制界面,设置并显示喷头与加热平台的温度变化曲线

3. 手动控制界面,可控制打印机的归位,打印机各运动轴的点动控制

4. 通讯终端界面,显示Spark系统与打印机的实时通讯数据,也可以手动向打印机发送GCode指令

5. 录像管理界面,可设置自动录像的参数,以及下载已完成的录像视频文件

6. 切片界面,仅在Spark系统安装切片引擎插件后才能使用
由于Spark系统内存有限,切片速度缓慢,建议使用Wiibuilder进行切片后一键上传至Spark系统,具体操作请参见
Wiibuilder在线打印与监控

IOS系统 - OctoPad
OctoPod安装与设置
1. 在App Store中搜索关键词octoprint,找到OctoPod for OctoPrint并安装

2. 打开OctoPod后,点击界面右上角的加号,添加打印机

3. 在Printer Name栏,输入名称,例如WEEDO 3d printer
在Hostname栏,输入Spark网络控制盒屏幕上显示的IP地址,例如http://192.168.10.13

4. 使用电脑打开Spark网络控制盒的页面,进入参数设置界面,FEATURES→API,屏幕上显示与API Key对应的二维码
5. 点击OctoPod界面上的Scan API Key,当系统提示访问请求时,点击好

用相机扫描API Key的二维码,API Key会自动录入OctoPod的输入框中

6. 点击界面右上角Save,保存打印机设置
\\如果OctoPod提示“Install OctoPod plugin for OctoPrint to…“,点击Dismiss

OctoPod功能介绍
1. 打印任务界面,显示打印机状态和当前打印任务的进度

2. 温度监控界面,显示喷头与加热平台的温度变化曲线

3. 自定义指令界面,需安装Custom Controls插件后才能使用

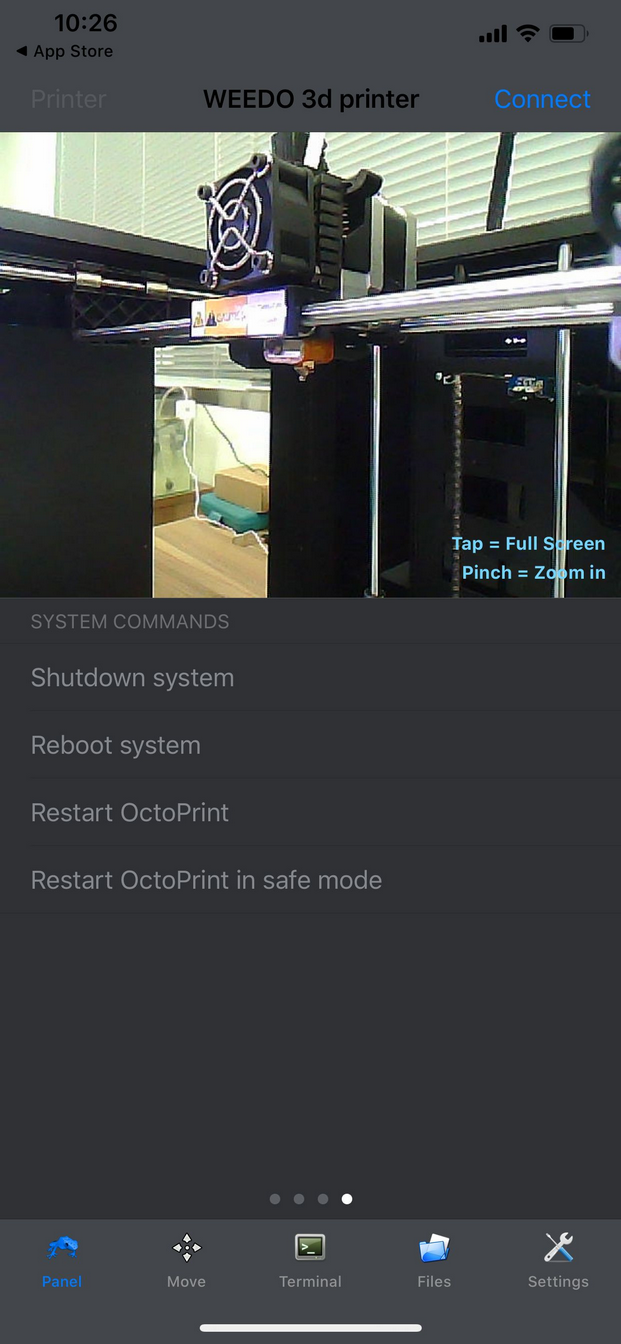
4. 系统控制菜单,菜单功能请参见,Spark工具栏
5. 手动控制界面,可控制打印机的归位,打印机各运动轴的点动控制

6. 通讯终端界面,显示Spark系统与打印机的实时通讯数据,也可以手动向打印机发送GCode指令

7. 文件列表界面,显示Spark系统和打印机SD卡中可打印的文件,点击右上角的加号可上传gcode文件

8. 设置界面,对打印的配置文件,以及OctoPod的各项参数进行设置

spark_app.1575014495.txt.gz · Last modified: 2020/09/21 13:43 (external edit)
Except where otherwise noted, content on this wiki is licensed under the following license: CC Attribution-Share Alike 4.0 International
